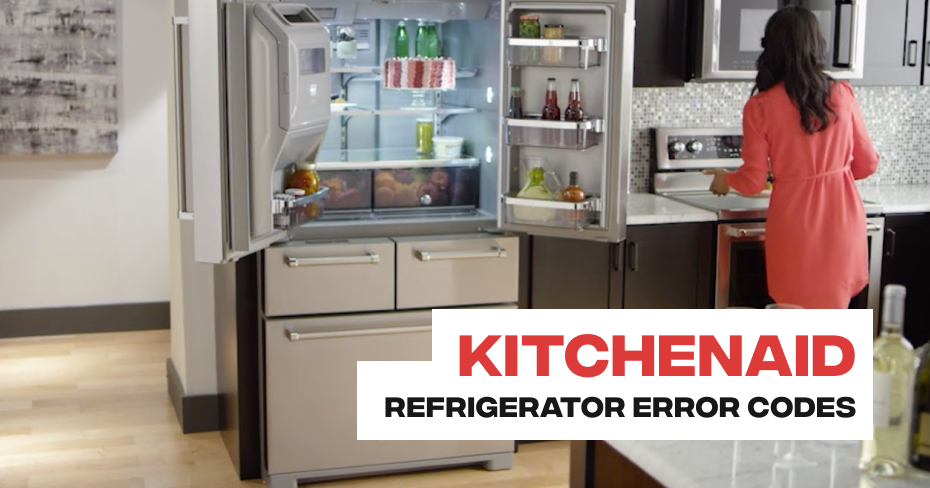
Kitchenaid Refrigerator Error Code 5E
When your KitchenAid refrigerator displays Error Code 5E, it signals a potential issue with the defrost sensor. The defrost sensor plays a crucial role in maintaining optimal temperature and preventing frost buildup within the refrigerator. If the sensor malfunctions, it can compromise the unit’s ability to regulate temperature effectively.
- Locate the Defrost Sensor: Identify the defrost sensor’s location in your KitchenAid refrigerator. Typically, it is situated near the evaporator coils.
- Inspect Wiring Connections: Carefully examine the wiring connected to the defrost sensor. Look for any visibly loose or disconnected wires.
- Reconnect Loose Wires: If you find any loose wires, gently reconnect them to the appropriate terminals on the defrost sensor. Ensure a secure connection.
- Verify Sensor Functionality: After reconnecting the wires, monitor the refrigerator’s performance. Check if the error code persists.
- Reset the Refrigerator: Power off the refrigerator by unplugging it or using the circuit breaker. Wait for a few minutes before restoring power. This can sometimes reset the error code.
Note: Dealing with electrical components requires caution. If you are unsure or uncomfortable performing these troubleshooting steps, it is recommended to seek the expertise of a qualified technician to ensure a safe and accurate resolution of the issue.
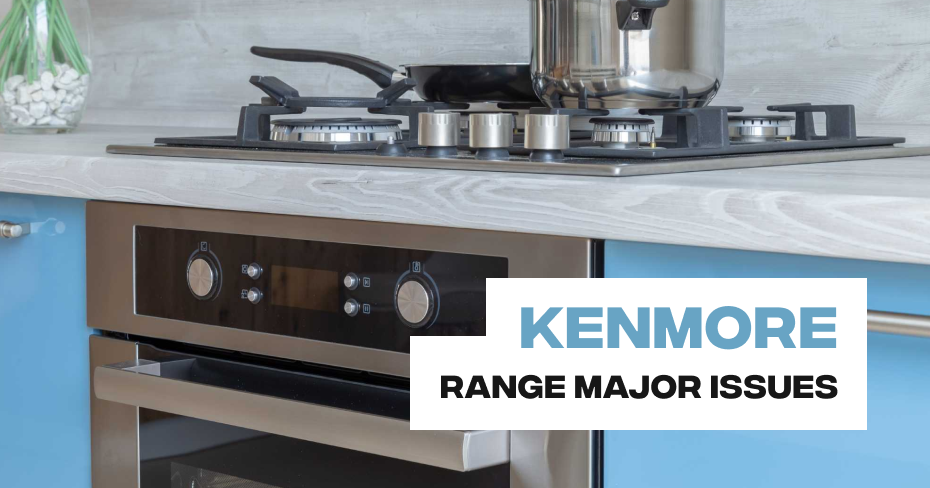
Kenmore Range Oven Door Problems
If you’re encountering problems with the oven door on your Kenmore range, it can impact both the cooking performance and safety. Here are steps to diagnose and potentially resolve oven door problems:
- 1. Check for Obstructions: Ensure there are no obstructions around the oven door that could be preventing it from closing properly. Remove any items or debris that may be in the way.
- 2. Inspect the Door Seal (Gasket): Examine the door gasket or seal for any visible damage, wear, or tearing. A damaged gasket can lead to heat loss and affect cooking.
- 3. Adjust the Door Hinges: If the door appears misaligned or doesn’t close evenly, it might be an issue with the door hinges. Some Kenmore ranges allow you to adjust the hinges to ensure proper alignment.
- 4. Clean the Hinges and Latch Mechanism: Accumulated dirt or grease on the door hinges or latch mechanism can hinder proper operation. Clean these components thoroughly.
- 5. Replace the Door Gasket: If the gasket is damaged or worn, consider replacing it with a new one. A faulty gasket can compromise the oven’s ability to maintain the desired temperature.
- 6. Test the Door: After making adjustments or replacements, test the oven door to ensure it closes securely and forms a tight seal.
- 7. Oven Door Springs: If the oven door has springs, check for any damage or wear. Faulty springs can affect the door’s ability to open and close smoothly.
- 8. Seek Professional Help: If the door problems persist, or if you encounter difficulties with adjustments or replacements, it’s advisable to contact a professional technician. They can diagnose and address any underlying issues affecting the oven door.
For safety reasons and to ensure your oven functions correctly, it’s essential to address oven door problems promptly.
Kenmore Range Burner Overheating
If you’re experiencing issues with a burner on your Kenmore range overheating, it can lead to cooking problems and potential safety concerns. Here are steps to diagnose and potentially resolve the issue:
1. Turn Off the Range:
For safety, ensure that your Kenmore range is turned off and that the overheating burner is not in use.
2. Inspect the Burner:
Visually inspect the overheating burner for any visible damage, irregularities, or obstructions. Ensure there are no foreign objects or debris causing the issue.
3. Verify the Control Settings:
Check that the burner control knob or switch is set to the desired heat level. Sometimes, the burner may overheat if it’s set to a high setting unintentionally.
4. Clean the Burner:
Overheating can occur if the burner ports are clogged or blocked. Clean the burner thoroughly to remove any debris or residue.
5. Test the Burner:
Turn on the range and test the burner. If the burner continues to overheat, turn it off immediately to avoid any damage or safety hazards.
6. Replace the Burner Element:
If the burner still overheats after cleaning and proper control settings, you may need to replace the burner element. Damaged or malfunctioning elements can cause overheating.
7. Seek Professional Help:
If you’ve tried the above steps and are still experiencing burner overheating issues, or if the issue is with the burner control, it’s advisable to contact a professional technician. They can diagnose and address any underlying issues that may be affecting the burner’s performance.
Kenmore Range Control Panel Issues
01 – Kenmore Range/Stove/Oven Oven Control Board
The oven control board displays the time, temperature, and settings for the range. If the oven control board has power to it but the display is dead, missing digits or dim, it will need to be replaced.
02 – Kenmore Range/Stove/Oven Display Board
If the display board is dead it may not be getting power from the main control board. If there is power to the display board but the display is dead, missing digits or dim, it will need to be replaced.
03 – Kenmore Range/Stove/Oven LED Board
The range’s LED board will usually display the time, temperature, and settings for the range. If the display only partially shows digits or is dim, it’s likely the LED board is faulty and should be replaced (if the whole display is not working, a defective control board is more likely the cause of the problem).
04 – Kenmore Range/Stove/Oven Main Control Board
The main control board sends power to the display board to operate. If the display board is not receiving power, the main control board is likely bad and will need to be replaced.
05 – Incoming Power Problem
Electric ranges require 240 volts of alternating current. Gas ranges require 120 volts. If the display board is not working, there could be an incoming power problem. For a gas range, if the oven light comes on and the burner sparks the range has power. For an electric range, turn on one of the surface elements. If any of the surface elements are working, the range has power. If the range does not have power, check for a tripped circuit breaker or blown fuses and correct as needed.
06 – Range in lock mode
Many ranges have a child lock or “Sabbath” feature which will prevent the buttons from being used when the feature is engaged. The range could also be in “Demo” mode or another mode which prevents full operation. Consult the range’s user manual for information regarding locking/unlocking the control panel.
07 – Kenmore Range/Stove/Oven Control Board
For many ranges, the control board interacts directly with the display to show the time, temperature, and settings for the range. If the control board has power to it but the entire display is not working, the control board is likely at fault and will need to be replaced.
08 – Kenmore Range/Stove/Oven Control Panel
The range’s control panel will usually display the time, temperature, and settings for the range. If the control panel has power to it but the display is dead, missing digits or dim, it will need to be replaced.
09 – Kenmore Range/Stove/Oven Radiant Surface Element
If some of the range’s main display is still working, but the surface element “hot” indicator light does not, it’s likely a radiant surface element is defective. You can use a multimeter to test the radiant element for electrial continuity to help determine if the part is faulty.
10 – Kenmore Range/Stove/Oven Surface Element Switch
If some of the range’s main display is still working, but the surface element “on” indicator light does not, it’s likely a surface element switch is defective. You can use a multimeter to test the surface element switch for electrial continuity to help determine if the part is faulty.
Kenmore Range Damaged Burner Elements
If you’re experiencing issues with damaged burner elements on your Kenmore range, it’s essential to address this problem promptly, as it can affect the range’s cooking performance. Here are steps to diagnose and potentially resolve the issue:
1. Identify the Damaged Element:
First, identify which burner element is damaged. You may notice visible damage, like cracks, holes, or irregularities in the element’s surface.
2. Turn Off and Unplug the Range:
For safety, ensure that your Kenmore range is turned off and unplugged from the electrical outlet.
3. Remove the Damaged Element:
Carefully lift or detach the damaged burner element from the range. Follow your owner’s manual or user instructions for guidance on how to remove the element. Typically, it involves lifting and gently pulling the element.
4. Inspect and Replace the Element:
Examine the damaged element for the extent of the damage. If the element is cracked, broken, or otherwise compromised, it’s best to replace it with a new one. Replacement burner elements can be purchased from appliance parts suppliers or the manufacturer.
5. Installation of New Element:
Follow the manufacturer’s instructions for installing the new element. It typically involves sliding it into place and securing it with any retaining clips or brackets provided.
6. Test the Burner:
Turn on the range and test the newly installed burner to ensure it heats up properly and maintains the desired temperature.
7. Regular Cleaning and Maintenance:
To prevent future damage to your burner elements, practice regular cleaning and maintenance. Clean the burners and the surrounding area to prevent food or debris from damaging the elements.
8. Seek Professional Help:
If you encounter difficulties during the replacement process, or if the burner element continues to malfunction after replacement, it’s advisable to contact a professional technician. They can diagnose and address any underlying issues affecting the burners.
Kenmore Range Gas Smell
Kenmore Range/Stove/Oven Valve
While all gas ranges will have a slight gas smell when the burners first light, a persistent smell could be the result of a damaged valve or gas tube. You can apply a non-corrosive leak detection solution, or dishsoap mixed with water, to the valve or tube connection points. The solution will bubble is a gas leak is present. If you suspect a leak is present, you should shut off the gas supply immediately until the issue can be resolved.
Kenmore Range/Stove/Oven Gas Valve Assembly
All gas ranges will have a slight gas smell when the burners light. This is normal. The smell should go away quickly after the burner has lit. If you still smell gas after the burner has lit, or when the range is not in use, you will need to call a certified technician to fix it.
Kenmore Range/Stove/Oven Safety Valve
All gas ranges will have a slight gas smell when the burners light. This is normal. The smell should go away quickly after the burner has lit. If you still smell gas after the burner has lit, or when the range is not in use, it’s possible the safety valve is damaged and you should contact a certified technician to fix it.
Kenmore Range/Stove/Oven Igniter
All gas ranges will have a slight gas smell when the burners light. This is normal. The smell should go away quickly after the burner has lit. If the oven burner lights within 90 seconds, but you still smell gas, it’s possible the igniter is failing.
Kenmore Range/Stove/Oven Surface Burner Valve
All gas ranges will have a slight gas smell when the burners light. This is normal. The smell should go away quickly after the burner has lit. If you still smell gas after the burner has lit, or when the range is not in use, it’s possible the safety burner valve is damaged and you should contact a certified technician to fix it.
Expected Gas Odor
All gas ranges will have a slight gas odor when the burners light. This is normal. The odor should go away quickly after the burner has lit. If you still smell gas after the burner is lit, or when the range is not in use, you will need to call a qualified technician to fix it.
Kenmore Range/Stove/Oven Spark Electrode
While all gas ranges will have a slight gas smell when the burners first light, the smell will be more persistent if a stovetop or oven burner does not light promptly. If a stovetop burner doesn’t light within three or four seconds, it’s possible the burner’s spark electrode is defective. Inspect the electrode to see if it’s visibly damaged or dirty and replace if necessary.
Kenmore Range/Stove/Oven Gas Tube or Connector
All gas ranges will have a slight gas smell when the burners light. This is normal. The smell should go away quickly after the burner has lit. If you still smell gas after the burner has lit, or when the range is not in use, it’s possible a gas tube or connector has developed a gas leak. You can apply a leak detection solution, or dish soap mixed with water, to the connection points. If the bubbles appear, you’ll know there is a leak. You can try tightening the connection or replace the gas tube and connector with a new one.
Kenmore Range Self-Cleaning Problems
Kenmore Range/Stove/Oven Touchpad
The door lock indicator light should come on and you should hear the lock motor running when the self-clean button is pressed. If the indicator light does not come on and you don’t hear a low humming noise as the door is being locked, it’s likely the oven’s touchpad is faulty and will need to be replaced.
Kenmore Range/Stove/Oven Door Lock Motor and Switch Assembly
During the oven’s self-cleaning cycle, the door lock switch activates the door lock motor to prevent the oven door from being opened. If the door lock motor and switch assembly is defective, the oven door will not unlock once the self-cleaning cycle is complete. On most ovens, you can open the oven door by removing certain screws or panels. Check your owner’s manual for further instructions.
Kenmore Range/Stove/Oven Temperature Control Thermostat
The oven thermostat sends voltage to the heating circuit and regulates the temperature of the oven during the self-cleaning cycle. It is possible for the oven thermostat to function properly for baking and broiling but not for cleaning. Due to its complexity, the oven thermostat is difficult to test. If you suspect the oven thermostat is at fault, replace it.
Kenmore Range/Stove/Oven Door Latch
For your safety, the self-clean cycle will not begin unless the oven door is locked. If the door latch is broken and unable to allow the door to be locked, the self-clean cycle will not begin. Inspect the latch for damage. You can also use a multimeter to test the latch assembly’s microswitch, if applicable, to determine if the switch has appropriate electrical continuity. If the latch is damaged or the microswitch tests negative for continuity, the door latch should be replaced.
Kenmore Range/Stove/Oven Oven Control Board
The oven control board has relays that send voltage to the bake and broil circuits according to the user settings and sensor input. If the control board is defective, it may not send voltage to the heating components.
Kenmore Range/Stove/Oven Door Switch
A defective door switch may prevent the oven door from locking. The door switch is often part of the circuit that causes the oven door to lock during the self-cleaning cycle. If the oven door is unable to lock, the self-cleaning cycle will not start. To determine whether the door switch is defective, use a multimeter to test it for continuity. If the door switch does not have continuity, replace it.
Kenmore Range/Stove/Oven Temperature Sensor
An oven’s temperature sensor monitors the temperature inside the oven cavity in order to maintain an accurate temperature. The temperature sensor may be out of calibration or stop working properly after it heats up. The sensor can be tested for a proper ohm reading at a set temperature with a multimeter to help determine if the part is defective or not.
Kenmore Range Uneven Cooking
Kenmore Range/Stove/Oven Bake Element
If the bake element is burned out, the oven will only be heated by the broil element. This will cause the oven to heat unevenly. When the bake element is heating properly, it glows red hot. If the element does not glow red, this indicates that the element is not heating. Often, if the element has burned out, it will be visibly damaged. Inspect the bake element for holes or blisters. To determine if the bake element has burned out, use a multimeter to test the element for continuity. If the bake element does not have continuity, replace it.
Kenmore Range/Stove/Oven Relay Board
On some range or oven models, a relay board will be used to send voltage to the broil element or the igniter. If the relay board is defective, the voltage may not be sent to the component and the oven broiler will not work. You can inspect the board for signs of damage or a shorted component. You can also use a multimeter to test for voltage reaching the broil element or igniter after reviewing the appliance’s wiring diagram.
Kenmore Range/Stove/Oven Igniter
The igniter draws electrical current through the oven safety valve bimetal to open the valve letting gas into the oven burner and igniting it. If the oven igniter weakens it can take longer than normal to open the safety valve causing oven temperature issues. To determine if the igniter is defective, observe the igniter when the oven is heating. If the igniter glows for more than 90 seconds without igniting the gas flame, this indicates that the igniter is too weak to open the oven safety valve correctly. If the igniter is weak, replace it.
Kenmore Range/Stove/Oven Broil Element
If the broil element is burned out, only the bake element will heat the oven. This will cause the oven to heat unevenly. When the broil element is heating properly, it glows red hot. If the element does not glow red, this indicates that the element is not heating. Often, if the element has burned out, it will be visibly damaged. Inspect the broil element for holes or blisters. To determine if the broil element has burned out, use a multimeter to test the element for continuity. If the broil element does not have continuity, replace it.
Kenmore Range/Stove/Oven Temperature Sensor
The oven sensor works with the oven control board to regulate the oven temperature. If there is an oven temperature problem, this sensor might be defective. The sensor can be tested by using an ohm meter. As temperature rises, the resistance measurement also rises. The manufacturer of the oven sensor determines the correct resistance, if we have a testing video associated with this part, watch it to learn how to test the oven sensor. Oven temperature problems can be caused by other things, but this is one of the common causes.
Kenmore Range/Stove/Oven Oven Control Board
The oven control board works in conjunction with the oven sensor to regulate the temperature. The sensor regulates the oven temperature by varying its resistance to electrical current as the oven temperature varies. As the oven temperature rises, the oven sensor creates greater resistance. If the sensor gives the wrong amount of resistance, the oven may not bake evenly. Or if the oven control board does not read the sensor resistance correctly the oven temperature can be inaccurate. On some models, you can recalibrate the oven control up to 35 degrees Fahrenheit higher or lower. Refer to your owner’s manual for instructions on how to recalibrate the oven control.
Kenmore Range/Stove/Oven Convection Element
The convection element works with the other heating elements to heat the air circulating inside the oven. If the convection element is burned out, the oven won’t heat evenly. To determine if the convection element is burned out, use a multimeter to test the element for continuity. If the convection element does not have continuity, replace it.
Kenmore Range/Stove/Oven Door Seal
An oven door seal that is torn or damaged will not provide a tight seal between the door and the oven frame, resulting in the oven having trouble heating up to the correct temperature and preventing the appliance from baking evenly. Inspect the seal for any damage and replace if required.
Kenmore Range/Stove/Oven Control Board
The control board works in conjunction with the oven sensor to regulate the temperature. The sensor regulates the oven temperature by varying its resistance to electrical current as the oven temperature varies. As the oven temperature rises, the oven sensor creates greater resistance. If the sensor gives the wrong amount of resistance, the oven may not bake evenly. Or if the control board does not read the sensor resistance correctly the oven temperature can be inaccurate. On some models, you can recalibrate the oven control up to 35 degrees Fahrenheit higher or lower. Refer to your owner’s manual for instructions on how to recalibrate the oven control.
Kenmore Range/Stove/Oven Convection Motor
The convection motor drives the convection fan to circulate the air inside the oven. The convection oven must circulate the air for the oven to heat evenly. If the convection motor won’t run at all, use a multimeter to test it for continuity. If the motor does not have continuity, replace it. If the convection motor still makes a humming sound, try turning the motor shaft by hand. If the motor shaft does not turn freely, replace the convection motor.
Kenmore Range/Stove/Oven Door Gasket
An oven door gasket that is torn or damaged will not provide a good seal between the door and the oven frame, resulting in the oven having trouble heating up to the correct temperature and preventing the appliance from baking evenly. Inspect the gasket for any damage and replace if required.
Kenmore Range Burners Not Igniting
Burner cap not on correctly
Make sure the cap is properly aligned on the burner head. If the cap is misaligned the igniter may not spark properly, and the burner flame will be uneven.
Kenmore Range/Stove/Oven Spark Module
The spark modules provides power to each surface burner spark electrode. If the burner is produces a weak spark, or if the burner sparks intermittently, the spark module might be defective. Before replacing the spark module, first check the spark electrode and the spark wire. If the spark electrode and spark wire are not at fault, the spark module is likely defective. If the spark module is defective, replace it.
Incoming Power Problem
The electrical outlet may not be getting power. To determine if the outlet is getting power, try plugging something else into the outlet. If the outlet is not getting power, check the home circuit breakers or fuses.
Kenmore Range/Stove/Oven Spark Ignition Switch
When the burner is turned on, the spark ignition switch sends voltage to the spark module to produce a spark. If the spark ignition switch is defective, it won’t send voltage to the spark module, and the burner won’t be able to produce a spark. If your range’s burner isn’t sparking, check to see if the other burners are sparking properly. If the other burners are sparking properly, the spark ignition switch is likely defective.
Kenmore Range/Stove/Oven Spark Ignition Switch and Harness
When the burner is turned on, the spark ignition switch sends voltage to the spark module to produce a spark. If the spark ignition switch is defective, it won’t send voltage to the spark module, and the burner won’t be able to produce a spark. If your range’s burner isn’t sparking, check to see if the other burners are sparking properly. If the other burners are sparking properly, the spark ignition switch is likely defective. If the spark ignition switch is not sold separately, you will have to purchase the switch and harness assembly.
Kenmore Range/Stove/Oven Spark Electrode
The spark electrode sends a spark to ignite the gas in the burner assembly. If the spark electrode is defective or worn out, it might not produce a spark, or the spark might be too weak to ignite the gas. As a result, the spark electrode will make a clicking sound when the burner is turned on, but the burner won’t light. If the spark electrode is defective, replace it.
Kenmore Range/Stove/Oven Surface Burner Valve
A stove burner that won’t light could be caused by a faulty surface burner valve. If you don’t hear the gas beginning to flow when you turn on the valve, the valve is likely defective and will need to be replaced.
Kenmore Range/Stove/Oven Surface Burner Base
A stove burner that won’t light could be caused by a misaligned or corroded surface burner base. The base holds the orifice holder and electrode in place to allow ignition. Inspect the base for any damage or corrosion and replace the component if necessary.
Kenmore Range/Stove/Oven Surface Burner Orifice Holder
A stove burner that won’t light could be caused by a bent or damaged surface burner orifice holder not allowing the gas to be ignited by the electrode. Inspect the holder to see if it’s misaligned and replace with a new one as required.
Kenmore Range Temperature Inaccuracy
Temperature inaccuracy in a Kenmore range can be frustrating, as it can lead to uneven cooking and result in dishes that are overcooked or undercooked. If you’re experiencing temperature inaccuracy issues, here are some steps to diagnose and potentially resolve the problem:
1. Use an Oven Thermometer:
Place an oven thermometer inside your Kenmore range to verify its actual temperature. This will help you determine how far off the displayed temperature is.
2. Preheat Adequately:
Ensure that you’ve allowed the oven to preheat fully before placing your dishes inside. Preheating helps stabilize the internal temperature.
3. Calibrate the Oven:
Some Kenmore ranges allow you to calibrate the oven temperature. Refer to your owner’s manual for instructions on how to do this. It typically involves adjusting the temperature offset to match the actual temperature more closely.
4. Check the Oven Sensor:
The oven sensor is a component that monitors and regulates the temperature inside the oven. A malfunctioning sensor can cause temperature inaccuracies. Inspect it for any visible damage or irregularities.
5. Clean the Oven:
Built-up food residue and grease can affect the oven’s heating patterns. Clean the oven interior and remove any obstructions.
6. Avoid Crowding the Oven:
Overcrowding the oven with too many dishes can disrupt air circulation, leading to temperature variations. Use multiple racks or bake in batches if necessary.
7. Seek Professional Help:
If you’ve tried these steps and are still experiencing temperature inaccuracies, it’s advisable to contact a professional technician. They can diagnose and repair more complex issues, such as faulty heating elements, malfunctioning control boards, or damaged sensors.